Hello, hello, hello! Are you ready for a new office? We sure are over here!
The plan from the get go when we moved into our house just over a year ago was always to make the third bedroom an office. Since then, it has been a black-hole-junk-pit-where-things-go-to-die :( We have to prioritize each project and this wasn't exactly at the top of the list. When we finish a project, we consider what we need as well as what we want, before deciding what project we will tackle next. The truth was...we
needed a place for more organization in the house.
Without an office we have no place for mail, bills, crafts, office supplies, etc. Our kitchen island and dining room table are storage places for any important papers that we have to take care of and I do not like that! That is not where that stuff is supposed to be. We finally said enough was enough and decided it was time to take on the office. <3
I think we spent the better part of a weekend on the floor of the office brainstorming, measuring, drawing plans, re-planning, looking through inspiration pictures, and re-planning again. We knew we wanted some sort of built-ins, storage for cleaning supplies (vacuum, mop, broom), office space, extra storage for mementos, and a space for guests in the future.
I pinned a lot of pictures of office spaces on Pinterest, but this one really spoke to us.
(I could not find the original source of this picture...every where I tried to find it was a dead end back to Pinterest. It might be from the website on my Pinterest link, but that site had a lot of content so I still couldn't locate it. If you find it, let me know and I will include it! Give credit where credit is due.)
The layout of this room was similar to ours with the window, and we loved the idea of a floating desk! We won't be copying this exactly, but it is our inspiration and in the end I know you will be able to see the similarities.
Here is what we were working with, looking toward the front of the room...
...and to the back...
In the top picture we are standing in the back of the room looking out the front window. The double french doors on the left lead to the rest of the house.
In the bottom of the picture we see those same french doors on the right and our second bathroom in the back (which contains our only real shower) and the laundry closet peeking on the left. We are definitely going to redo that bathroom in the future (hopefully sooner rather than later), so no judgments!
It is a big space, but we literally didn't own anything but random stuff that just ended up in there out of lack of any place else to put it.
Here is what we planned to do:
1. Use Ikea kitchen cabinets (yes, we love Ikea stuff, and it works great for us) to create built in cabinetry along the front wall for our desk area. This would act as the major storage in the room.
2. Drop the counter top height in front of the window to create a desk and...
3. Build a second 'floating desk'
4. Build open shelving above the back wall of cabinetry.
5. Create another seating area made up of a built in bench (with storage under the seat) and table.
6. Frame windows.
7. Add lighting.
8. Purchase large love seat with a pull out couch for extra sleeping space when needed.
To help us in out planning, we used masking tape on the floor to show where our lower cabinets would fall.
We pulled the desk out of the sun room to imitate the floating desk and placed a chair at the window where the fixed desk will be. We also shoved all the cabinets and dressers we had in there against the wall where the lower cabinets were planned to give us a feeling of they layout. This helped us make sure we liked the design and that there was a good flow through the room.
Once we were confident in the direction we were going we started some prep work.
In doing this prep work, I learned something new. What I have called a window
sill my entire life...is actually a window
stool. WHAT?! The window sill is the actual framing that a window rests on. The window stool is the decorative piece added to close it in and make it look nice. Mind blown.
So we removed the window
stools.
In our plan, the lower cabinets overlap the window by a few inches. We would not have been able to get the cabinets against the wall with the inch or so that the stool sticks out. We didn't care for the marble stools that we had, so we ripped 'em out. With the plan to frame the windows, we will be replacing these with wood anyway.
They popped right off with a little elbow grease. The Engineer just cut the caulk around the stool with a utility knife and gently (and repeatedly) hit the bottom with a hammer to get it loose.
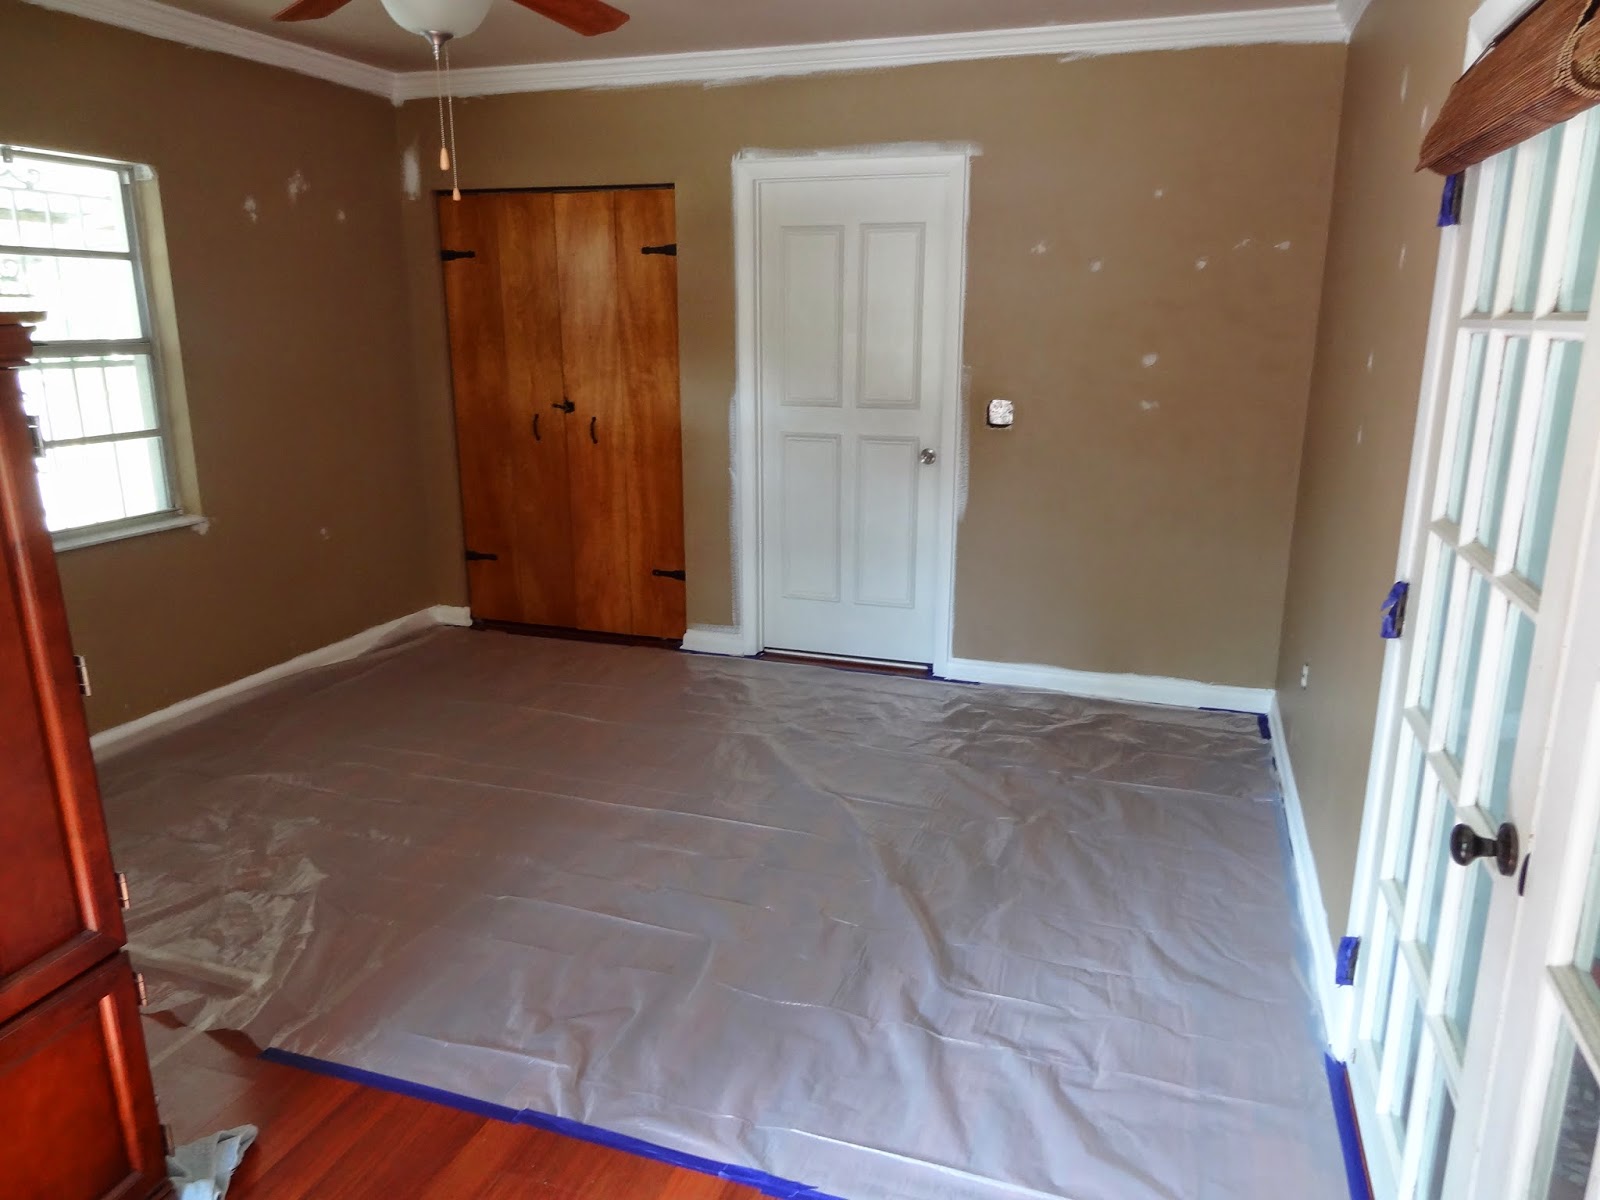
We moved everything out of the room to give us a clean work space (less the two heavy armiores haha), making the rest of the house a complete mess now. I guess the mess just comes with the territory right? With all the junk gone, you can clearly see the taped out areas for the built in cabinets.
A tall 30 inch wide pantry-like unit will be on the far left with one 24-inch cabinet next to it. From there we will drop a piece of counter top to desk height in front of the window. On the right side of the window we will return to counter height with a set of 24 inch drawers, and wrapping around the wall will be a corner cabinet unit and an end cabinet. Lastly we will have a desk on casters to move around when we want to use it in different areas of the room.
With everything out of the room we had easy access to the crown molding that needed some attention. There were a lot of places that were not flush with the wall and there were noticeable gaps everywhere. We got some paintable caulk and filled those prior to painting the molding :)
While The Engineer was doing that, I was testing some paint colors on the wall. During our previous Home Depot trip we were trying to decide what color we wanted to paint the room. The $3 sample paints were totally worth it to us because when we got our base color (bottom right below) it looked so light to us! So we picked up a sample of a slightly darker grey too (top right), just in case. We also grabbed a sample of a dark grey (top left) that we would be using as an accent wall.
I was really glad that we used the samples because our original pick was spot on and our 'safety' color was definitely too dark!
One good tip when you are testing paint colors on your wall...if you are planning on white trim, paint white between the colors! We could barely tell the difference between the two colors on the right before the white was painted in (its difficult to tell in the picture, but in real life the colors were very different and the lighter color on top was a no brainier).
The Engineer also moved a light switch for me!
The light switches for the bathroom were on the outside, which irked me to no end. Whhhyyyy??? So he flipped it around for me! Well, maybe not just for me...the built in bench is slated to go on this wall, and the light switch was going to be in the way of the backing of the bench. By flipping the switch to the inside of the bathroom, we were getting it out of the way, and we knew we would be covering the hole up with the bench! Win.
We turned the power off and The Engineer marked all the wires and disconnected everything.
He cut a hole on the bathroom side for the switches, and simply flipped it around in the wall.
Now, my switches for the bathroom are actually in the bathroom. We have a hole on the outside for now, but like I said, we will cover that up when we build the bench. I don't think I got a picture of the finished switch, but I'll include it in another post for you.
With these things out of the way, we are ready for paint. I'll putting together a painting post, and I'll be right behind that with the cabinet builds ;-)
Have a great weekend all! We're busy over here!