They really pull things together don't they? It was a little awkward looking without them haha.

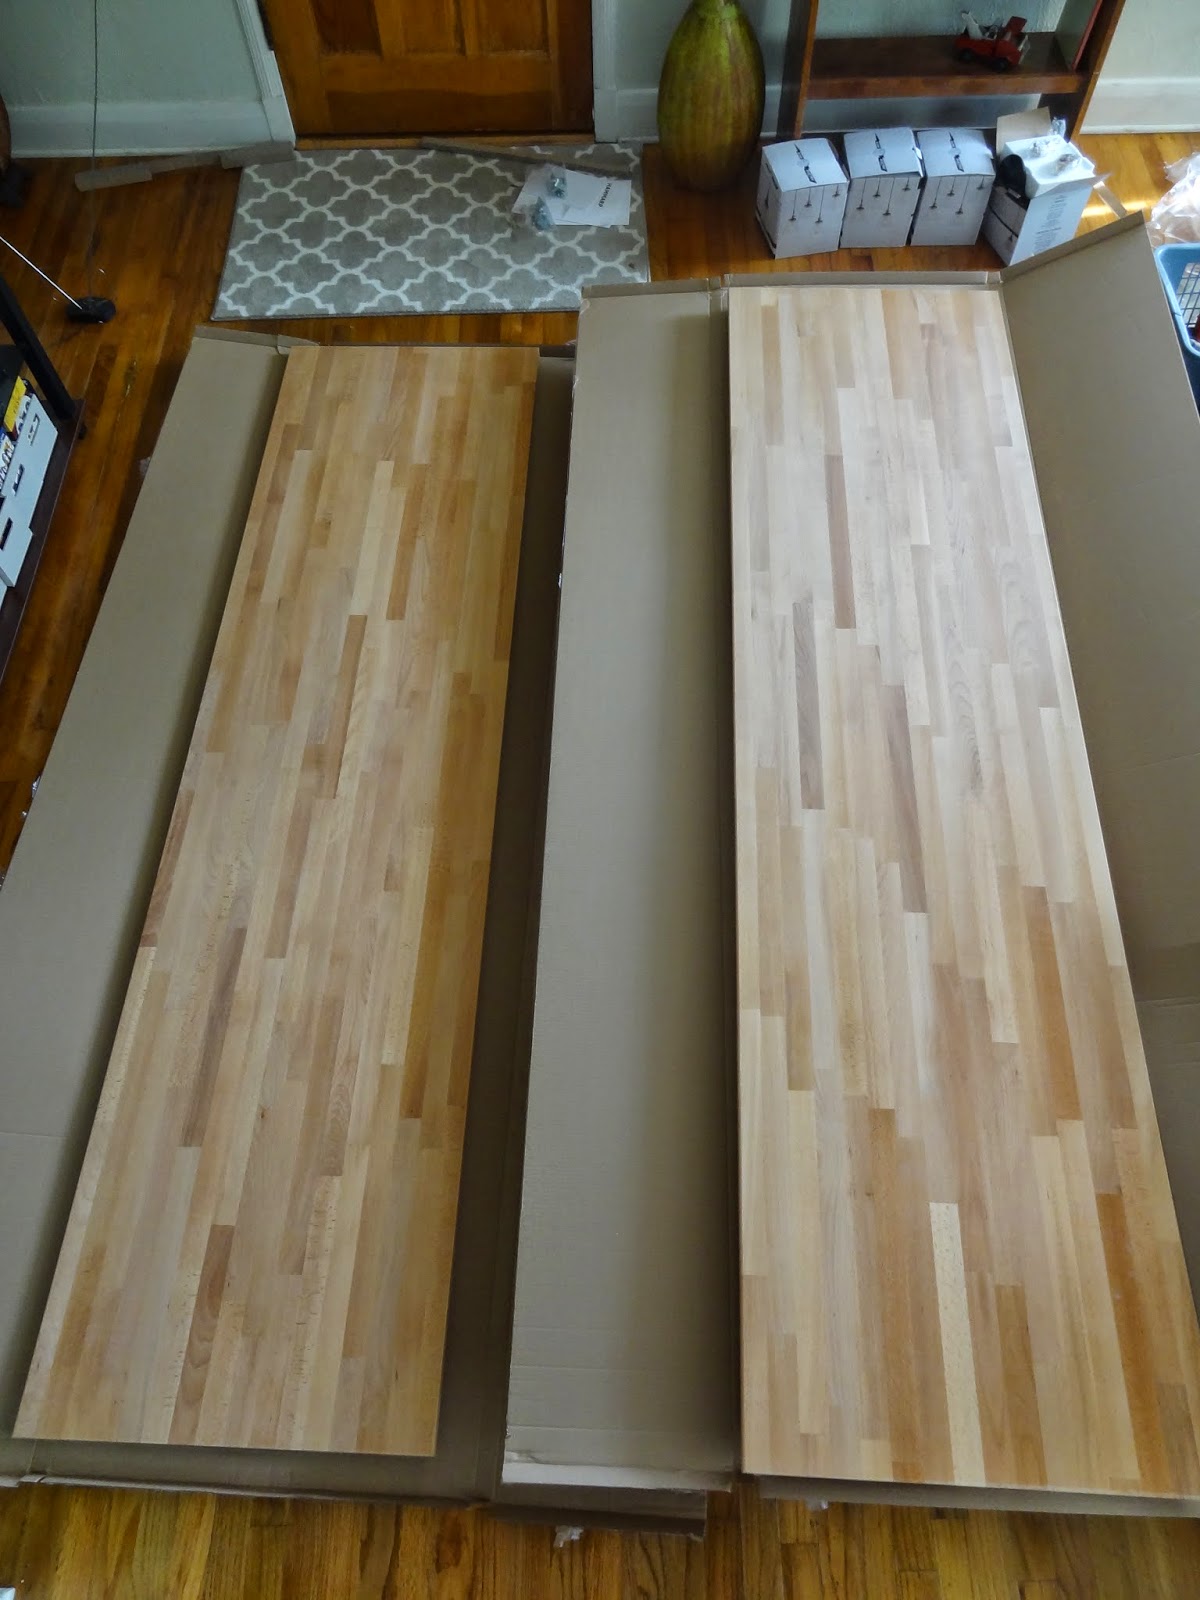
We went with solid wood HAMMARP beech countertops from Ikea, the exact same one we have on the dry bar. To get all the pieces we needed, we had to get three of the longer 98-inch countertops (diagrams of this below).
Originally, we were pretty set on hiring someone to cut the countertops. We didn't know what the cost would be, but figured it would be worth it mostly because we had a corner to deal with. With a corner in the picture that meant we had to get two 45 degree cuts to perfectly line up. Eeek!
But we did some research and knew that it was well within our capabilities even though it was scary. When my dad offered to come over and help us with the cuts we decided to go for it.
Before cutting, we applied three coats of oil to the wood (we used the BEHANDLA wood treatment oil that is recommended and sold by Ikea).
During this step they ended up taking over our living room. Again.

The oil applies with a white tint but dries clear. Similar to stain, you wipe off the excess after it dries for 15 minutes. It is also extremely forgiving...there are no brush marks so you can be a little sloppy if you want ;-)
Our design called for five different sections of countertop that we needed to create from the three long pieces we bought. Below are the layout and dimensions (not to scale):


We didn't have too much scrap (noted in black in the above diagram) which was nice. We started with the longest piece at the top and worked our way down. This piece was going to be the full length of the board less what we had to sacrifice to cut the 45 degree angle. We were very lucky to have some wiggle room with our length. This meant that if for some reason something didn't go right with out cut that we could make another cut without creating a huge gap somewhere.
Our supplies were pretty simple:
1. Circular saw
2. Guide (in our case just a scrap piece of wood)
3. 2 clamps
4. Masking tape
5. Speed square
6. Measuring tape
Since we were cutting the corner off, we made a few practice cuts within the scrap area to make sure we were happy with the guide we set up for our circular saw, cut speed, maneuverability, etc. We used a 1 x 5 piece of wood as our guide (do yourself a favor and make sure that the guide you choose is straight!) and we used a speed square on the edge of the countertop to carefully line it up at 45 degrees.

When we were confident that our guide was working as intended, we lined it up for the real deal.

Since we were keeping the full length of the countertop, we were aiming to cut as close to the edge as possible, thus we lined up just inside the corner of the wood at 45 degrees.
We put painters tape down to protect the wood from the circular saw as it slid along the countertop (the saw doesn't cut directly where the guide is, it cuts about an inch in front of it so we wanted to protect the wood from scratches incurred while cutting) and The Engineer started his cut.


I could tell by his facial expressions that it was not going well, but he did a great job and continued the cut to the end (when making precise cuts like these, you DO NOT want to stop in the middle).
Sure enough, the tape didn't stick to the oiled wood well and had gotten caught up in the circular saw.
The cut wasn't bad though and we took it inside and set it in place to see how it looked.
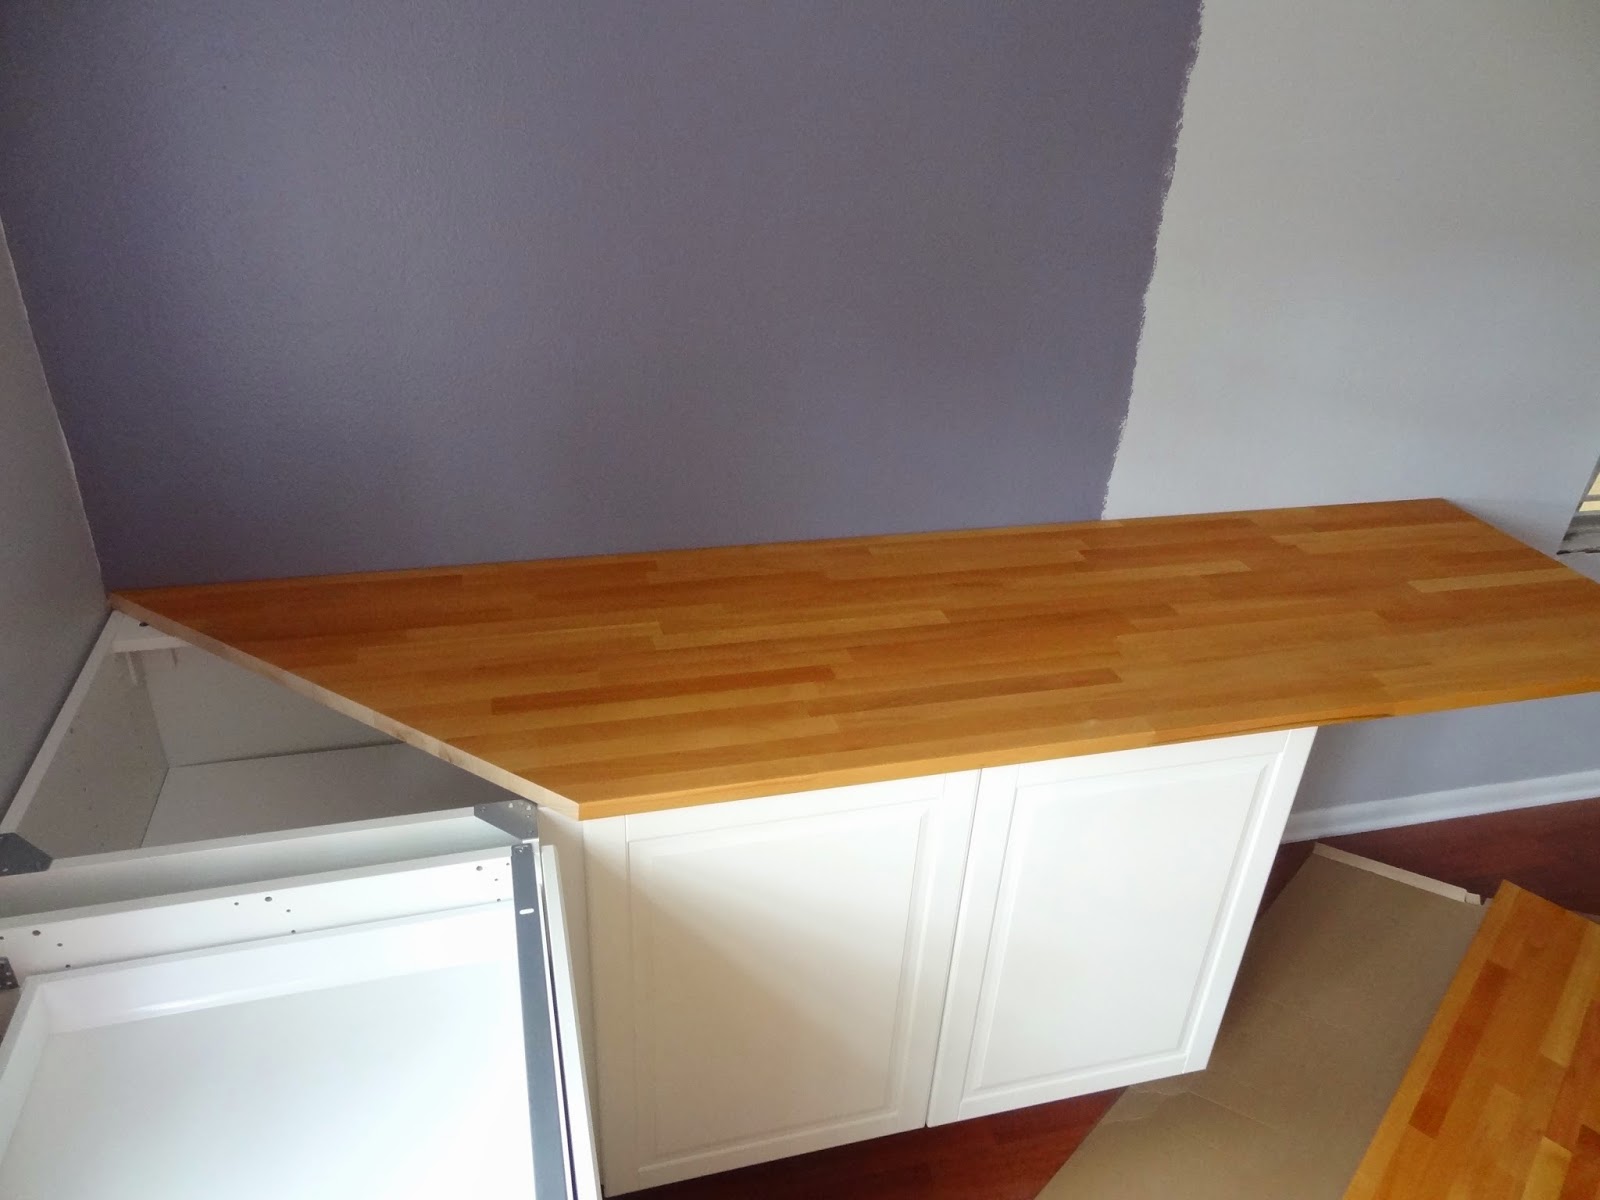
Now that's exciting to see!
On the opposite corner cut we switched to masking tape and I could tell when I put it on that it stuck to the wood much better.

The masking tape worked perfectly and after cutting the second piece we brought it to see how they lined up. The seam was definitely slightly off and by using a metal straight edge against each cut we could tell that our first cut was not quite perfectly straight. So we brought it outside and cut about 1/8 of an inch off. Like I mentioned, we were lucky that we had the flexibility to do this. If you don't have this type of flexibility, make sure you test your tape on some practice cuts too. The second cut turned out much better and the corner lined up very well the second time around!

After the corner cuts, the rest were a piece of cake. We just set our guide at 90 degrees and made straight cuts!

Just for some perspective, the three countertop pieces from above are all 36 inches tall which is standard kitchen counter height. Standard desk height is more like 29-30 inches. So none of the above areas will actually be desk space. The main desk is going in that gap below the window:

and we are going to drop the countertop to 30 inches. It will go from the side of one cabinet to the side of the opposite cabinet. I am super glad that we measured the front of this opening and the back of this opening because our room is not square and the two measurements were off by a quarter inch. So when we cut this piece we made our cut at an angle and the desk piece slides in perfectly. The final scrap piece will actually be used as the top for a floating desk that we are going to build.
So there you have it folks. That's how we cut our countertops on our own and we are very happy with the results. A big thanks to my dad for helping us out! We're working on getting them installed so I'll be back soon with the details on that!