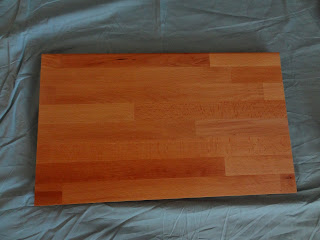
Hey guys! I’ve got a cool little project to share with you
today: I made my dad a customized cutting board for his birthday! No, he’s not
a master chef. He does, however, love to fish. When he was helping us cut our countertops, he commented in passing about how the scrap wood would
make a great cutting board for cleaning fish. Thanks for the hint, dad!
So for my dad’s birthday I made him a cutting board, but I
wanted it to be more than a hunk of scrap wood from our countertops. I wanted
it to be my dad’s so I went a little
step farther and gave it some subtle customization.
Pretty cool right? He loved it, and it really wasn’t hard to
create, it just took a little patience. The Engineer helped me cut a scrap from
the office countertops to size. I didn’t take any pictures of this step since
it was all hands on deck, but it was the same process we used when cutting the countertops for the office. After cutting the scrap to size I sanded the edges, rounded the corners, and
gave the entire board a once over with the hand sander.
Then I began the process of treating the wood to protect it.
For a cutting board, you want to penetrate and protect the wood
from cut marks and bacteria. I went with Butcher Block Conditioner that I picked up at Home Depot (you can find it here). This is a food grade product, which was important to me since I knew my dad would be using it to clean fish that he would eventually be eating! This process
took a little patience, though it was super easy. It takes all of 60 seconds to
apply a coat, but it has to dry for several hours between applications. A new cutting board takes three to four coats to ‘season'. Plus, I wanted to do both sides so there would be no worry about which side was safe to cut on. Thus, this part took several days, mostly comprised
of waiting.
Somewhere in the middle of sealing the cutting board, I
decided that I wanted to do a little something more. I thought about it for a
little bit and remembered a project that a friend of ours, Traven, had done. He
took a pallet and made a beautiful clock out of it.
I love the rustic look and especially like how he made the
numbers. He actually burned them into the wood with a soldering iron.
I thought this would be perfect for the cutting board and quickly ran out to buy the cheapest one Home Depot had in stock :) (I didn’t need anything more powerful than this). It came with two flat tips and one round tip. Following Traven’s lead, I chose my design and printed it to use as a template.
I thought this would be perfect for the cutting board and quickly ran out to buy the cheapest one Home Depot had in stock :) (I didn’t need anything more powerful than this). It came with two flat tips and one round tip. Following Traven’s lead, I chose my design and printed it to use as a template.
I picked the outline of a snook and incorporated my dad’s
initials. I loosely taped it on the cutting board, though I held it in place
anyway while I was working. I used the pointed tip to trace the outline in a
dotted fashion.
When I took my template off I had a dotted outline that I
needed to complete.
I first tried with the flat tip, but since my design didn’t
have any straight lines, I wasn't a fan of how it was translating.
So I changed back to the rounded tip and slowly went on my way. Enter the
second round of patience required. Not that tracing my template and filling it
in was hard, but it just took some time to wait for the iron to burn into the wood. I remember Traven talking about the slowness of this when he made his
clock. I totally understand now how much time it must have taken for all those
numbers!
At the very end I switched back to the flat tip to smooth out
some rounding spots caused by the rounded tip. I was so glad I took the time to
add this because I really think it takes it from ordinary to schweet :)
I applied two more coats of the butcher block conditioner after I burned the
snook in because I definitely wanted the grooves to be sealed!
All in it took about a week to finish, but if you take out all the waiting it
was less than a two hour project! I’m so glad he liked it. Just another benefit
of building a home office right? ;-)


No comments:
Post a Comment