Tuesday, April 15, 2014

Tree Trimmin

So many things to do, so little time...

Our trees needed trimming. Bad. 


Maybe it doesn't look so bad to you but we had a few problems with the situation. The limbs over the driveway were pretty low. Our moving truck didn't even have a foot to spare when we moved in. The limbs over the house were also very low. In various areas limbs had been trimmed, but they weren't taken all the way back to the branch collar (the spot where the branch splits from its parent branch or the trunk), leaving us with rotted stubs. Finally, the right side of the front and side was so overgrown that it was like a dark little forest cave. In the back we had similar low limb problems over the shop and shed.


It was just bad news bears to have that many low limbs over the house and sheds with all the hurricanes we have around here. We knew this would be a big job but we were up for the task. With three large oak trees, tall palm trees, and a few other miscellaneous trees up high in the sky, we decided that renting a man lift was the way to go. I'll tell you up front...totally worth the money!!!


We hit a good rhythm with the front oak and were getting things done just as planned. We only ran into one minor whoops. The limb over the driveway was by far the biggest limb we took down.We went along in sections so we didn't kill our driveway, made sure the lift was properly positioned, and were using ropes to direct falls. Unfortunately, we had a 'flop' as I like to call it. This huge piece hit the ground just fine and flopped toward the driveway. That was all well and good, but it was a few inches to long and caught the edge of the driveway and smooshed a bit of the concrete.  


Didn't see it? Yeaaahhh, its only about two inches, but it made me so sad because we were on track for a perfect record! Trust me, I'm beyond thankful that we got the job done safely and that no one got hurt :)


I suppose we had another casualty because if you glance at the background of the picture up there with the large limbs in it, you will notice that the big one in the back crushed some of our plants in front of the oak. Oops, they will bounce back!

We completely finished the front yard on day one!


Epic difference! And yes, I just said that. And no, our tree isn't dead. It is just the last oak tree to the 'lets drop all of our leaves and grow new leaves' party. Its just now sprouting new leaves while our neighbors trees are full and lush. Slow and steady, buddy, slow and steady. 

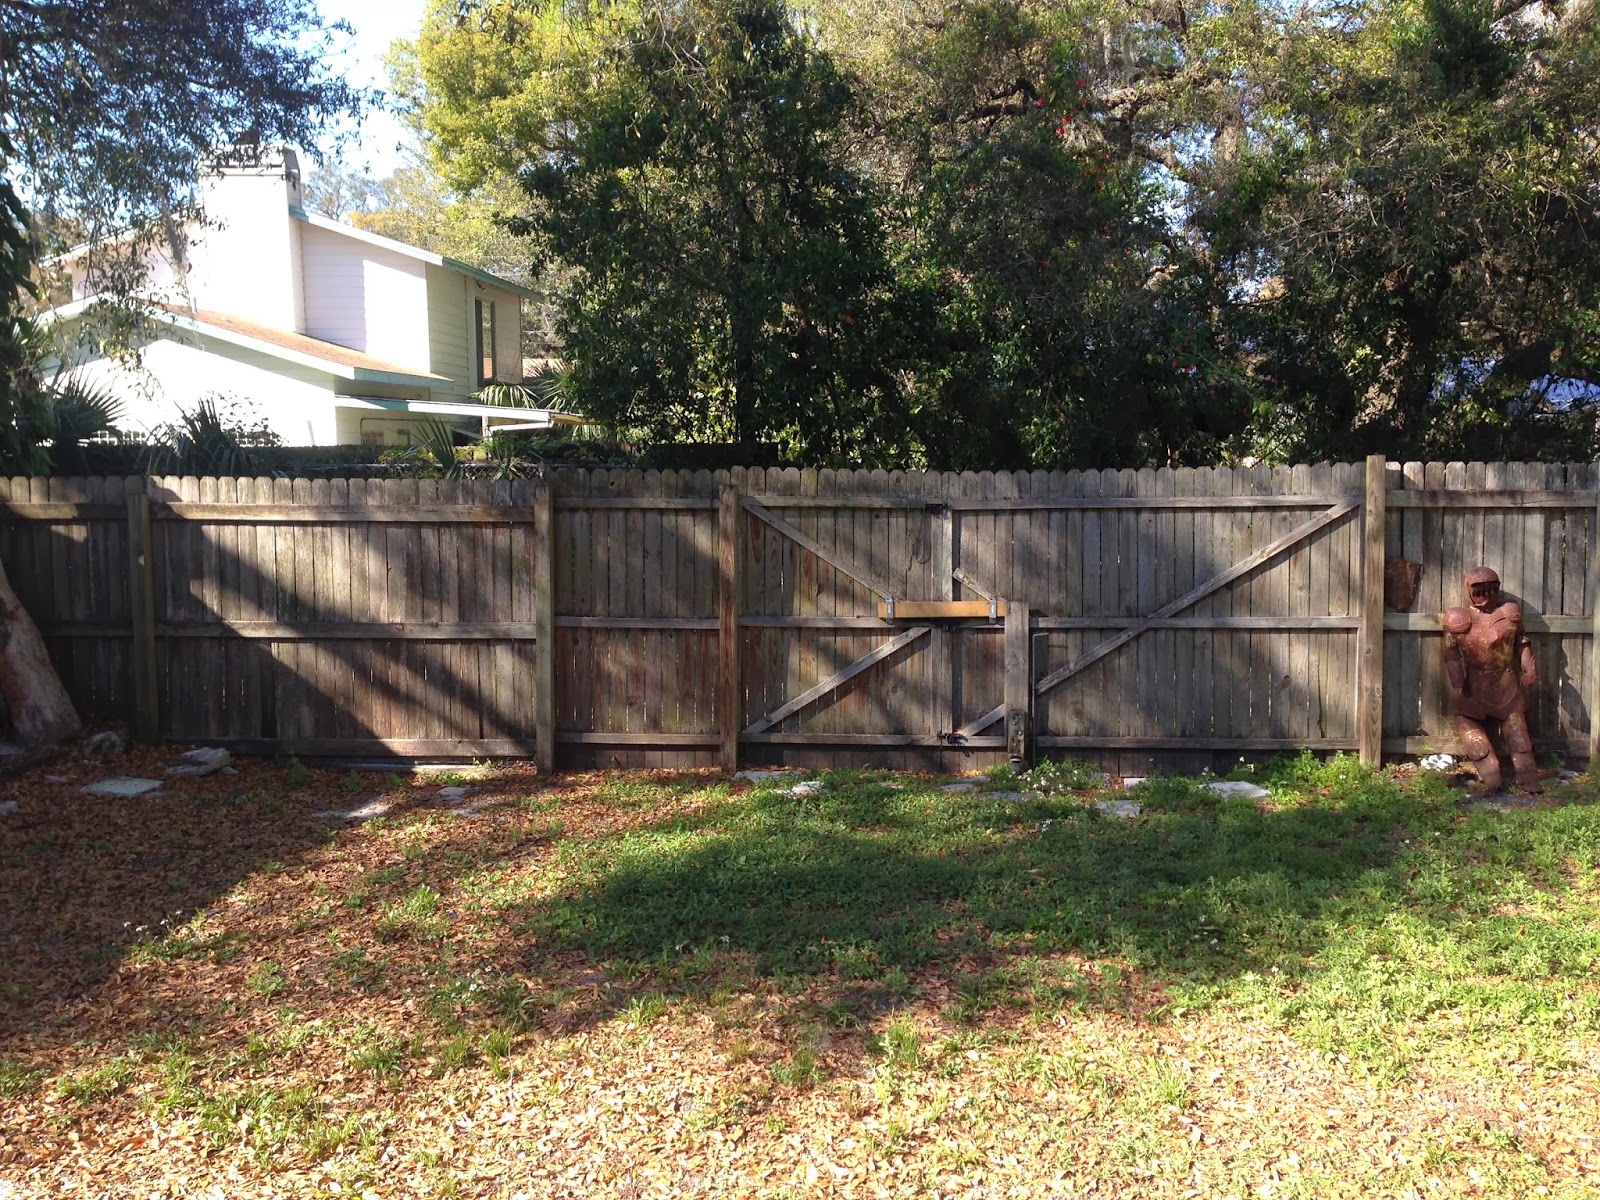
We tackled the back yard on day two and it also went really well. Some highlights: 

The Engineer stretching the legs of the lift and trimming above our beloved light post. What are the chances we can get that removed? One of the oddities of our home haha!


The before and after of the shop:


This one is a little difficult to tell because of the rough lighting in the before picture. If you remember from this post The Engineer had already trimmed a few low branches the day we worked on that corner of the yard. 

The before and after of the shed:


The area above the shed opened up very nicely, much better than the pictures portray. We also removed that bush tree thing to the left of the shed. It was a mean thorn infested plant covered in a thorn infested vine. Seriously. It looks and feels so much better now. 

The removal of the dead tree trunk:


The awesome mulch pile that is now where that trunk used to be:


The next weekend we rented a wood chipper because we had SO much on the ground. 


So so much, the pile practically covered the backyard. It was worth it though to get the chipper to not only get rid of all our branches and small limbs but now we don't have to buy mulch when we get around to out bed areas. Win! 

Trimming the trees made such a big difference and it was a big item to check off the list. I'm so glad we got it done before the hot summer months and before the hurricanes rolled. in. We are starting to love our yard now. We really can't wait until we get sod in. :) 

Friday, April 11, 2014

Cabinet Upcycle!

On New Year’s Day this year (before we moved out of the apartment and into the house) I told The Engineer I wanted to do something productive and fun and I suggested that we redo this cabinet (it also has a matching armoire that we will do something with in the future). 


We figured we were going to put this piece in the dining room and use it to nicely store/display some overflow kitchen items. We wanted to roughly match the paint color to the kitchen island and cut the inlays out of the doors and replace with glass inlays. Thus, we made a plan.

To Do:
1   1.  Remove inlay from doors.
2   2. Strip stain from top.
3   3. Sand remainder of cabinet.
4   4. Cut quarter round to frame the windows in the doors and install.
5   5. Cut thin piece of backing to cover side inlays and install.
6   6. Prime/paint cabinet (excluding top, which will be stained).
7   7. Cut and install Plexiglas in the inlays of doors.
8   8. Spray paint hardware.
9   9. Stain top.
    10.  Seal.

The demo was pretty hysterical. The Engineer got a Sawzall for his birthday and that was our tool of choice to cut out the door inlays…in the kitchen. Yup. We’re pretty excited to have an actual shop at the house and to feel justified in buying the tools we need. Back at the apartment we just didn't have the space for that kind of stuff. 


Cutting the inlays out was easy and straight forward but since they were literal inlays we then pulled the remaining part of the inlay out of the slot it was nested into with plyers.

We bought a cheap sheet of backing from Home Depot and had them cut it to the size we needed for the side inlays. We felt no need to remove the original inlay which made this step a little easier. The piece we found was in the scrap bin and was about 1/8" thick. Since the pieces were already cit to size it just took a little sanding to get them to fit in snugly. We secured them with wood glue and a few brad nails. It was at this point that we realized we liked the color contrast and opted to buy two blue colors instead of just one. 


We bought quarter round for the doors and in addition, a miter box since we don’t have a miter saw and weren't ready to make that investment. The Engineer cut the quarter round at 45 degree angles at the corners and made sure they fit will in the doors.  We just used wood glue to attach the quarter round since they were wedged in the doors tightly. Since we didn't own enough clamps to hold all the pieces down, we got creative and tied them with left over string from the wedding. We have more clamps now :)

At this point everything was ready for sanding and painting. We tested sanding the top by hand and knew immediately that we would be investing in an electric sander. We decided on the Ryobi electric pad sander and it. is. awesome. It feels like we already got our money out of it on this project and have used it for more! Needless to say, that made sanding the top a breeze. The next morning I sanded the remainder of the cabinet, with the electric sander where I could and by hand everywhere else (on the balcony and not in the kitchen this time!) and gave it a good wipe down before I primed it. It took me a good 1.5 hours to prime everything by myself while The Engineer was at his flight lesson.  I know that sounds like a lot but there were a lot of little nooks to get into!


When he got back we both started painting the cabinet. We had decided on the Behr color Coastal Mist to paint the entire cabinet with, but after seeing the lighter inlay on the side the previous night we opted for two colors, which was a great audible. We matched the darker blue to the blue on the new kitchen island (as best as we could from pictures). We knew it won’t be perfect, but it doesn't have to be. They aren't right next to each other but when you have them both in your view you see some continuity. We also pulled another audible when we were purchasing the second paint color and decided to stain the top light to match the kitchen island as opposed to dark to match the kitchen table as originally planned. We had really started to enjoy the natural wood on there, so we kept it!

Painting was straight forward, I just had to go back and do some touch up where the painters tape failed us. 


We glued the Plexiglas (after cutting it to size via scoring and snapping method) to the back side of the quarter round and were pretty excited with how well it turned out. I then went overboard taping the hardware for the spray paint but I was terrified of getting any over-spray on the newly installed Plexiglas. 


We stained the top with our natural stain and sealed it after we moved to the new house.

We are really happy with how it turned out and I love love love the way it looks in the new dining room!!!


The two colors make the inlay cover up on the side look more intentional and the windows in the doors let me display pretty serving items from the kitchen while storing them at the same time which is a double win with the limited kitchen storage here. 

In case you forgot where we started...


I'm excited to re-purpose the matching armoire! 

Tuesday, April 1, 2014

Closet Door Upgrade

I love a lot of things about having a house built in 1950. I love the original wood floors. I love the original windows (that desperately need to be refurbished, but that’s another day…ok…another many days), old door knobs, a front porch with steps and a railing. What I do not love are old sliding closet doors.


These are in our master bedroom and leave much to be desired...for me at least. I knew from our first viewing of the house that I would redo those doors if we bought it. I scoured Pinterest for ideas and knew that any upgrade other than a simple paint job would be difficult because whatever I did had to be less than ¼” thick to still allow for the doors to slide past each other. I then saw an idea to do a mock inlay using paintable wall paper.

Before you cringe more than you already are, let me defend myself here. I am not a wall paper fan. I have never put it up and have suffered through taking it down. Yes, it is cool that you can get a pattern or texture on the wall via the paper, but if you ever want to change it, taking it down is a nightmare. So then why you ask, have I decided to put wall paper up in my new house?

This door treatment had to be flat, which wall paper is. The wall paper had depth to it, which made it cooler than just paint. It would give the inlay look to a door that I otherwise couldn't build out to look like that. It was also going to be a small amount of paper on two doors so at the end of the day if I hated it, it wouldn't be an entire wall I had to rip down. I decided to go for it and dove right in.

I first needed to sand the doors to get a coat of primer to stick (which is recommend to paint before you put up wall paper). It turns out that the last two times someone painted those doors they didn't sand at all and just painted on top of the previous coat of paint. This resulted in sheets of paint peeling off and scraping/sanding through all those paint coats down to the wood to make sure we wouldn't have wall paper slumping off our doors in a few years. The Engineer was amazing enough to put some elbow grease onto the doors to get all that stuff off!


While The Engineer was attacking the doors, I took the hardware that I had previously removed outside to give it a fresh coat of black spray paint since they were pretty worn. Ever tried to paint screw heads but couldn't get them to sit upright? Here’s a good little trick to take care of that problem: lay out newspaper on a dirt or short grass surface and just poke the screws into the ground and they’ll stand with up! With the newspaper between them and the ground, you won’t lose them either J


Don’t forget to read the comics before you spray paint over them either ;-)

I also cut my wall paper to size while The Engineer was still teaching those doors who was boss. Fun fact about wall paper: Home Depot does not sell wall paper of any kind. They directed me to the contact paper when I asked L. Lowes does have the paintable wall paper I was looking for, though they don’t have many options…maybe 6 different patterns. That was fine with me, there was a bead board looking one that I loved so I was sold. With that and my glue I was set! When I was cutting the paper to size  I kept in mind that I would want to cut the sheets skinny enough to fit between the door handles when the hardware was put back on.

I had also been thinking that I wanted to be able to frame the wall paper to make it look more finished but I had to think of something that would fit between the doors. That ruled out just about everything! I accidentally came across the perfect solution at Michaels while looking for something else. I found this thin sheet of balsa wood that was 4” x 36” which meant I could cut it into four 1” x 36” strips. Two of these were the exact height of the wall paper panel (72”) and the rest would finish framing the top and bottom. I cut those and the wall paper using an x-acto knife on cardboard with a level as my guide.


With all the prep work done I got to priming. Priming the doors wasn't bad, but painting the inside was a little cramped. If you are wondering by now, we did try to take the doors off, but they are hung in such a way that you would have to take the molding off to get the doors off. We didn't want to do that so we left them hanging and just dealt with it. I did get some primer on the molding, but that seems like a good excuse to go ahead and give it the fresh coat of white paint it is screaming for! I finished that and let it dry overnight. 

My mom helped me hang the wall paper which was easier than I had anticipated. The glue I bought was a little odd because it was a bottle with a built in foam roller. The only problem was that squeezing the glue onto the roller created a lot of drippage because the little built in tray wasn't big enough, or shaped properly, or something along those lines. Long story short, I didn't want to buy a big bottle of glue and this was the only small option. Make sure you use a drop cloth either way!! Once the glue was applied we lined the paper up with lines I had drawn on the door with a level before hand to make sure we hung it straight in the right spot. I smoothed it flat with a wood paint stir (classy, I know) and it worked great! The paper even had a few crinkles in it from moving around and they came right out. I couldn't even guess where they were now. I wiped up excess glue around the wall paper and called it a night!


My next step was to glue on the balsa wood frame. I wasn't sure how this would go even though it seemed pretty straight forward. You never want to underestimate a task! I started with the top piece to make sure I had a good base to run the sides to the floor from. I thought about pre-cutting it before I glued it on the door but decided against that. My main reason for going about it this way was that I knew that the door wasn't level/square and that my theoretical 18” width might not be exactly 18” on the top and/or bottom! So I let it live on the edge for a while. 


I simply applied wood glue to the back of each balsa piece and used a level when I placed it on the door, overlapping the wall paper by ¼” or less.  On the first door I cut the pieces on the door, and on the second door I pre-cut. I definitely liked the second method better. It was faster and easier even with the measure twice cut once method.


I let the wood glue I used dry overnight and then painted. The painting actually spanned a few days because I painted in sections due to the fact that the balsa wood brushed the top portion of the door ever so slightly. I also painted the surrounding trim. A few days later I had white doors with subtle detail! I put the hardware back on and we were in business!!


It’s not a big change, but the white paint compared to the dull cream/eggshell color and new textures make a big difference!


Tuesday, March 25, 2014

2014 Gasparilla 15K Race Recap

Better late than never right?

For me the Gasparilla 15K was about one thing and one thing only.

Finishing.

And I finished!

Leading up to the race I mentioned that the last few long runs I had scheduled fell by the way side during moving and the associated mayhem. Thankfully I knew that and I knew better than to push myself during the race.

Although my only official goal was to finish, I did hope to run below 11:30/mi pace. I am NOT a fast runner and NOT good at distance running. It just ain’t my thing…I be like “where’s the water?” So while this is painfully slow for some, it is really on target with my abilities and fitness level right now given that I would be running farther than I had in training. The majority of my long runs had been clocking in at slightly over an 11:00/mi pace.

At the start I strategically positioned myself directly between the 11:00/mi and 11:30/mi pacers, praying I wouldn't see that 11:30 pacer again. Heh.

A good two minutes past the start, I rolled over the starting line. The first 4 miles were great, I was running solid between 10:45 and 11:30 (yes, that’s about as steady as I get). There were a lot of people on the course the entire time. While that caused a lot of dodging and weaving, I welcomed the distraction. I really paid attention to running straight lines around the turns. I try to do this in tri’s but I really focused on it here because I knew I would be struggling at the end and wanted to help myself as much as possible.

The course was a simple out and back on Bayshore Blvd. The turnaround was just over half way and I was just starting to feel it here. This was my first opportunity to gauge where I was against the pacers since I hadn't seen the 11:00/mi pacer in a while. I was still well in front of the 11:30/mi pacer, though I lost a little bit of ground on the middle mark between the two. After the race I looked back and saw that I had been running a 11:26/mi pace up to the turn around so I was right on track!

Somewhere between the turn around and the next water stop I hit the stop button on my Garmin. I happened to notice when I was drinking water that I was stuck on 5.2 miles! All I knew was it had to be after the turn around where I hit the lap button and visibly got confirmation that it was still running. Oops! I did get a little second wind out of the mishap because when I looked up from my Garmin I could see the 6 mile marker. So it felt like I skipped about ¾ of a mile :-D.

Shortly after is where I started to break down a little. Mile 6.25 to 7.25 was rough! I was just tired, my legs were heavy, and I was in need of some nutrition. As luck would have it, the next water station had Gatorade! I welcomed that boost and kept trucking, very slowly J

By mile 8 I was in a place of “if you stop you will never start again” so I didn't stop again! No more water, no breaks for anything, just running for the finish! I didn't even have a sprint at the end, but I did finish at a steady pace. The last few miles I just kept telling myself that I was capable of this and I would be really happy that I didn't stop and give up. The 11:30/mi pacer passed me in that last mile but I was ok with it because I knew I was doing what I could to get to the end.

I finished in 1:48:12 which translates to an 11:36/mi. I’m very happy with that after the training I had. And I was so proud that my legs carried me 9.3 miles!


Some final thoughts about the race itself…

At the race expo there was a board with every participants name on it. Pretty neato, plus it was fun to find your name.

The weather was perfect…overcast with a tiny drizzle here and there. If the sun had been out I would have baked underneath it. It was really muggy though.

Such good organization! Gasparilla is a huge event and they keep it running smoothly! Props!

The race ultimately gave me the confidence to finally tackle my first Olympic triathlon. Not that I was making my triathlon schedule for the season last night or anything J!


Thursday, March 20, 2014

Garage Sale Domination

Since moving into the new house we have wanted to hit up some garage sales on a Saturday. It took a few weekends to have the time to do so, but man oh man did we make out big! I’ll put it this way…when was the last time you had to go home and unload the car (ahem…jeep) to be able to go back and fit the rest of your garage sale finds in the car? Yup, we totally did. And we made out like bandits! I put together an excel sheet (did you expect anything less?) of our finds, including what they asked, what we paid, the retail value, and the percentage saved. I included the spread sheet at the end of the post for those who are interested in the details. For those who aren't…we got $691 worth of stuff (that’s a pre-tax figure) for $155. I call that a win.

I wasn't sure how many garage sales we would find, but there were plenty. We first went to an estate sale which was a little disappointing, given that everything in the house was for sale. I did pick up this old gin bottle for a relative since that is their drink of choice. I thought it was pretty cool and I’m hoping she will appreciate it!


At the next garage sale I saw this easel for $15!!!! An easel like this is about $100 and we put in the sun room where it is just waiting for a cool piece of art to hold. Love love!


They also has a really cool light at this garage sale for only $10 kinda like this this which I really liked, but there isn't anywhere in the house for it to go so I sadly left it there for someone else.  One thing we did really well with was not buying things we didn't need just because they were a good price.

We found these two coolers for $2 each which is something we've been looking for but didn't really want to spend the money on.


Our next stop was a little funny because it was at a house we actually looked at buying when we were house hunting. The Engineer was a little nervous about stopping because we had run into the owner when we were there looking at the house and didn't want it to be weird. I convinced him that we should stop though because a few things had already caught my eye and thank goodness we did because that was a jackpot stop!

We bought a wheel barrow (one of the items The Engineer specifically wanted to find at a garage sale), an 8 foot fiberglass step ladder (another awesome score!), a small outdoor table, a box of dollar tools that The Engineer snagged a few items from, and a gas can.


This was a great stop not only because we got a number of items we were looking for, but we also got a nice bulk price. The asking price at the garage sale for this stuff was $52 and we got all of it for $40…retail value...$253!!! Not kidding! This was about the time we reached critical mass. We already had the easel in the jeep and we now wanted to add a wheel barrow and 8 foot ladder! It probably took about 20 minutes of re-arranging, and the removal of the wheel barrow legs, but we got it all in eventually.

At the very next house we stopped at we saw the holy grail of furniture. The reason this item was such so amazing was because we had been searching for a very particular piece for a very particular spot and didn't want to spend a lot of money on it. It was a tall order.

We have a very small pantry and there is this small spot in the kitchen on the wall between a window, a doorway, and the island that a little hutch/cabinet could fit. It was only 29 inches wide and had to fit below the light switch. Options were few and far between, and expensive. The best thing we had found up to that day was a little cabinet (maybe 2 feet tall and 1 foot wide) that had a small trash can pull out and one drawer…for $160! And it was unfinished wood; we would have to stain it ourselves. Not that we minded the staining, but to us that was a lot of money for something so small and unfinished. I am SO GLAD we held out!

Enter the most amazing cabinet ever…


And the problem of our car being completely full…remember that easel, wheel barrow, and ladder? Yup. We literally did not have enough room in the car. We liked it though and it matched the feel of the house really well and the price was right. $55 for a completely finished piece of furniture. We talked it over with the sellers and they generously offered to hold it for us while we went home and dropped all our other stuff off. They even knocked off $10 for the gas! So for $45 we got this wonderful cabinet that was the perfect solution to our pantry problem!


We knew it was wider than the space on the wall, but we felt that if it overlapped the window it would be worth it. As if it couldn't get better, it was shorter than the window. J

We also picked up the two planting pots pictured above on the small outdoor table for $0.50 each.

Now we had a virtually empty car and a good number of garage sales left to stop at that we spotted during out trip home. You would have thought by this time we would be worn out or that the good deals would be gone, but we were on a pretty big high from all our success and scored a few more deals.

We got a croquet set and fertilizer spreader for $20.


Christmas lights, $10 for 4 packs. We have one strand of white that we used for our tree last year (my first real tree!) but that won’t really cover the tree and house this year haha.


Our last little find were these picture frames for $5 each. They still had their Pier One price stickers on them…$25 each!


The spread sheet I made has the listing price and the price we paid after some bartering. Then I put the retail value which I determined by looking online for the cheapest comparable item. This method gave me a conservative estimate for the price. Some items like the cabinet were difficult to find a good price for so I estimated. I doubled the asking price for the cabinet ($110) which I know is definitely lower than it would sell for in a store.


All in we spent $155 for a list of items worth over $691. I know these items are used but they will work perfectly for us and you can’t beat the savings! I will gladly pay less than ¼ of the cost any day!


Friday, March 14, 2014

Yard Demolition

Per the original agenda for house work, the yard was going to be left to rot away until some major things in the house were accomplished. I suggested this mainly because once you put some work into your yard, it then requires regular attention to maintain it. I thought since the yard was already deteriorating we would be better to redo some things inside the house that, once completed, we didn't have to spend any more time on upkeep. Those projects would simply be done.

That looks great on paper and sounds pretty logical but when your yard looks like this…


…priorities quickly shift. I’m also pretty sure our neighbors are tired of looking at the weed factory we have for a front lawn.

Thus, The Engineer and I picked a beautiful day and started some yard demolition. This meant getting rid of a bunch of stuff that was gifted to us by the previous owners. We started by ripping up pavers, bricks, cinder blocks, and rocks that were literally all over the yard.  I kid you not. I have NO IDEA how this many different pavers ended up on this piece of property and for what purpose. This is the stack after we ripped up maybe half of what is randomly placed, buried, or abandoned in the yard.


Crazy right!!! The good news is that we plan to use most of it in one form or another. We want to use the cinder blocks to build raised planters for our garden (more on that area below) and we will make several paths in different areas with the pavers. We have several different kinds too haha! We have red paver squares (still in the ground), white paver squares and rectangles (some pulled up and many still in the ground), red brick, (half pulled up and half in the ground), and slate (still in the ground). The slate is AMAZING. It is currently mixed in as stepping stones in a shell path. We plan to rip it all up and pack it tightly to make a fire pit area and plant green grass in the cracks, like this. The crushed shell will be moved to the side by the carport where our trash cans reside and we will put a mulch path to the shop and shed


Anyhoo, we started our backyard cleanup behind the shop. There were several lengths of drainage gutter, a ladder (thank you for leaving that!), two sections of rolled up chain link fence, a tire, and a box full of, you guessed it, more pavers! Actually this box was faux rock used for siding. When the sunroom was added the bottom was faced with these and looks very nice. I did notice that it didn't go as high as I wanted, so I’m excited to have this extra material that I can someday finish the facing with. It isn't high on the list of things to do, but it is on there! That entire area was cleaned, purged, and raked of leaves. We are only left with the ladder and gutters, much cleaner!

Cleaning the future garden area was next on the list. This area was pretty much self-volunteered as the garden because it already has a lemon tree (another awesome thing that came with the house!). It is kind of off to the side and gets a decent bit of sun. The only problem was that it was a mess. We ripped out some overgrown bushes, removed the trash that had migrated over there from behind the shop, raked the leaves, pulled out an old fence post from a chain link fence, cleaned off all the pavers, and trimmed the lemon tree! Here is the before and after:


It’s hard to call it better because now it just looks dismal and empty so we decided to use the word closer. Closer to our goal J. The mess of pipes in there is an old well with a broken pump. We plan to fix that up and use it for our irrigation system since we are pretty sure the well will be fine with a working pump. The pavers in this area of the yard make the most sense of anywhere, but unfortunately they are very dirty and quite un-level. The plan is to make a simple path form the gate to where I was standing when I took the picture from the red pavers on the other side of the yard since they are the best looking ones. Once it was all cleaned up I realized we should have trimmed the lemon tree a month ago before all the blossoms came in. Oops. We still trimmed it a little, mostly taking dead and bottom branches off to promote upward growth. Next year it will get a big trim! It’s not perfect, but it is closer.


At some point in this process we realized that the gutter on the shop was overflowing with leaves. The Engineer climbed up there to shovel it out and brought yet another cool item the previous owners left us, the pole saw. He wasn't going to do any real work, but you know how it is when you have a new toy to play with. You also know how it is when you start to trim tree limbs…there’s always that other limb that if you just took it down too things would look so much better! He wanted to just try it out and ended up cutting four decent size branches. It is not a finished job by any stretch of the imagination. We had actually planned to take the limb he was working on all the way back to the trunk. Because it is over the shop we knew it would need to be taken down in pieces, so it wasn't a waste of time at all. We are pretty sure we will rent a man lift to do all our tree trimming because we have A LOT of old tall trees, and a lot of trimming on each one! It does look nice with the area above the shop opened up though!


The last thing we did was rip out our ‘sand box’ that was in front of the shop. I say ‘sand box’ because it isn't any place I would let a kid play. The sand was actually dirt and you see that dead tree trunk back there? We found carpenter ants in it. Not to mention that we don’t have kids and someday when we do, we will build them a much nicer sand box elsewhere. It was easy to remove, just four boards nailed together.


 So now we have a pile of dirt and firewood. We left the dirt there because we will use it as fill in areas that need it when we redo pavers. It isn't super attractive, but its closer. Oh, and well take the useless, carpenter ant infested tree trunk out too J


Anyone else working on the yard? The weather has been perfect lately for outdoor jobs!

Tuesday, March 11, 2014

The Best Upgrades are Free!

The house has taken over life! (In a good way.) I thought I’d make a laundry list of some of the little things we have been tackling around the house!

My parents were here a few weekends ago and helped us with some housework. The Engineer and my dad hung 8 sets of blinds (I think). They made such a big difference! There were a lot of windows with little fabric panels on them or a see through covering which is not cool at night when you are in display. The new blinds look wonderful and still let all the light in when we want it.


My mom helped me clean, prime, and paint this wall.


Can you tell I forgot to take a before picture?!

We didn't really like the look of the wood finish, but I knew if we just painted it white it would look like brand new bead board. And it does! This was a free upgrade too because the previous owners left us a bunch of paint in the shed. Some of it was completely dried up, but it is great to have some of the matching paint for the house for free! I actually really like this wall now! We have the same stuff on the entire back wall of the sun room and I CANNOT WAIT to get my brush on it!


I also recently got that blue wood box to use as a shoe basket. It isn't the typical shoe basket, which I love, and it’s not huge or deep encouraging the pile up of shoes.

After I painted the little wood accent wall I found the interface between that and the adjacent trim to be dismal at best, so I carried the white paint on the trim a little farther :)


Sooooo much better!

Another free upgrade was the removal of some odd items in the backyard.


On trash day I included the old ‘protected by Brinks’ sign (which why it was on the inside of the fence I’m not too sure haha), that wonderful massive saw blade, a padlock which was locked with no key in sight, a metal Mexico dish, and a one-eyed metal frog (not pictured). Some of these things are kinda cool on their own, but all together I didn't like the look it all gave off. I also took down a hand painted sign from the shop (and by hand painted I mean finger painted) that said something along the lines of defending your right to protect yourself. Not fancy. The trash can loved it though!


Now all we have is our knight in shining…errr…rusted armor. I like him though. I think he needs a name.

There has also been a lot of cleaning going on. There was A LOT of dog hair left in the house for us, so I've been looking for every nook and cranny trying to get rid of all of it! Cleaning things makes me smile after the fact even if I am a grump through the process. I don’t like dust and old dog hair.

I’ll save some of the little additions to the house for another time. My current project is working on an upgrade to our closet doors. I’m pretty excited for this one because I am not the biggest fan of old sliding closet doors.